Okta Directory Sync (SCIM)
Follow these instructions to configure Okta attribute mappings so that you can control Hashboard roles through your default Okta profile. The procedure will be similar for other SCIM providers. Contact your support Slack channel or support@hashboard.com if you'd like assistance configuring SCIM for your organization.
Start these instructions when you are prompted to provide a Directory Provider Value in the Hashboard SSO portal:

Overview
Here is a summary of the overall configuration:
- The Okta profile of each Hashboard user will be configured with one or more Hashboard roles
- During mapping, those roles will be transformed into a comma-separated list with the
Arrays.toCsvStringexpression - This list will be passed to Hashboard in the SCIM payload
Details
The below instructions show how to configure Hashboard roles as part of the default Okta profile. Your own workflow may vary depending on your setup.
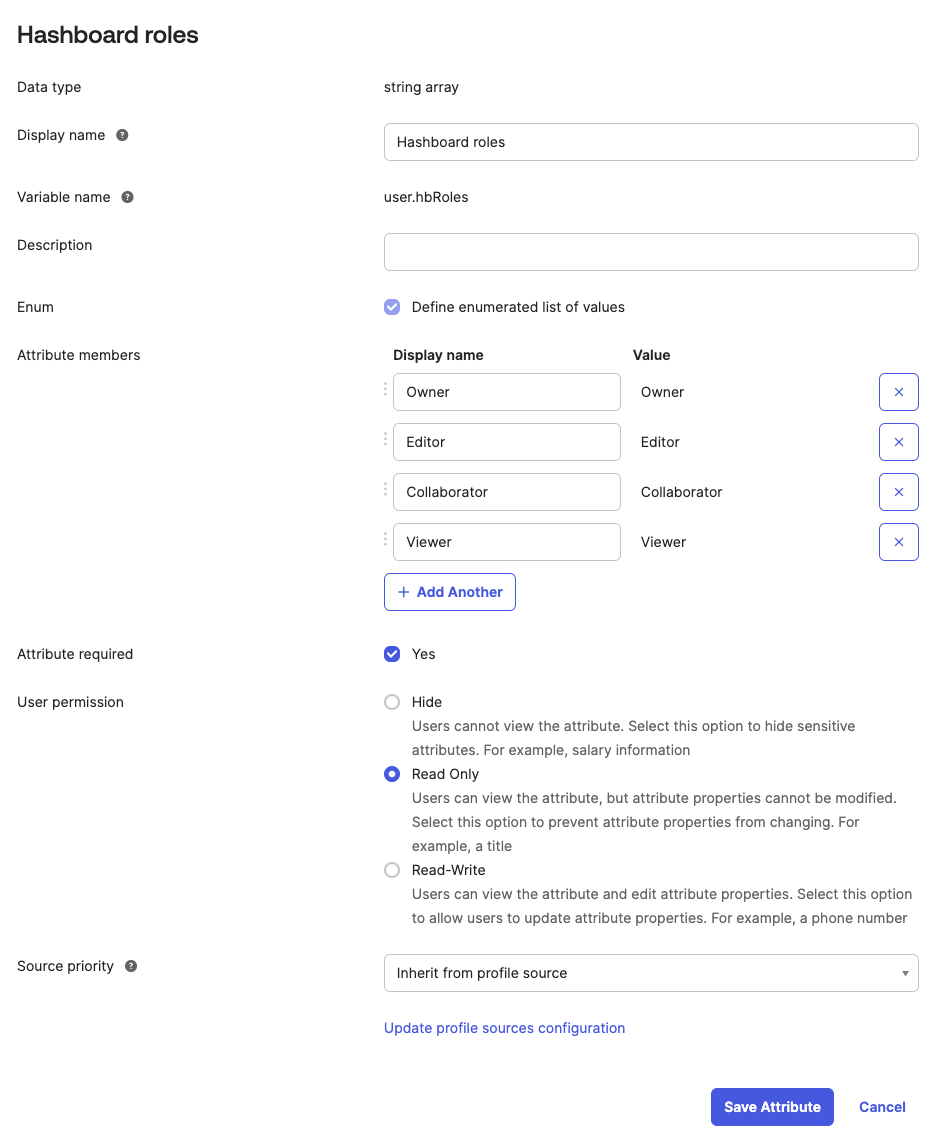
- In the Profile Editor, edit your default User profile and add an attribute with the following properties:
- Type
string array - Display name "Hashboard roles"
- Variable name
hbRoles - Check off "Define enumerated list of values", and add one entry for each Hashboard role. (You can add to this list later if you add additional custom roles.)
- Check off "Attribute required: Yes", if desired.
- Click Save
- Type

- Edit the profile of a user and assign them some Hashboad roles. Note that, although we are testing multiple role assignments here, most typically each user is only assigned one role.

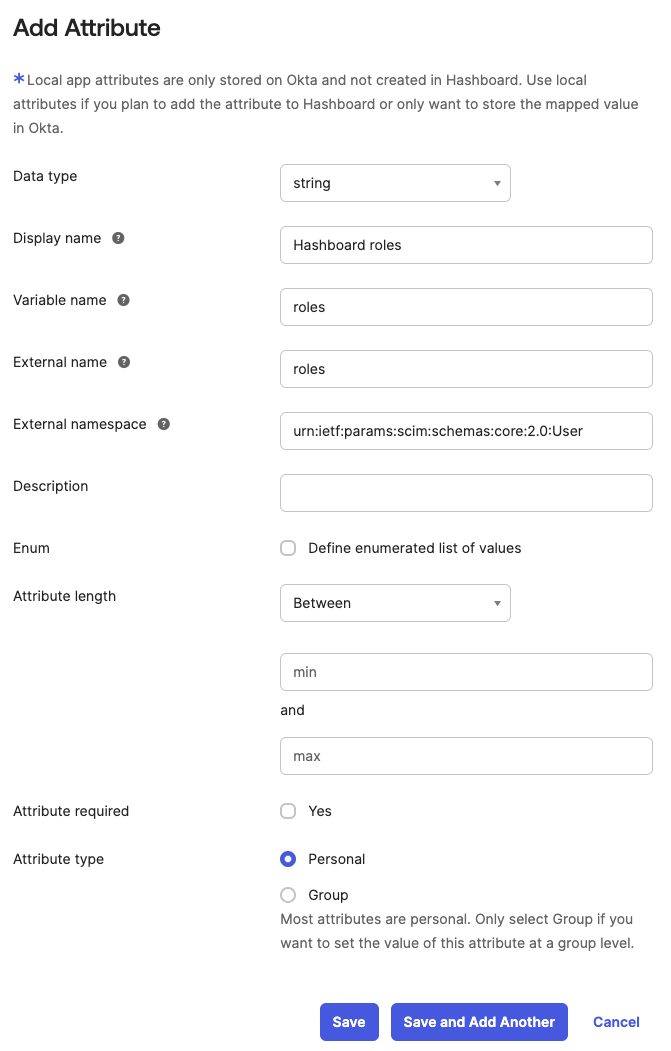
- Back in the Profile Editor, edit your Hashboard User profile and add an attribute with the following properties:
- Type
string - Display name "Hashboard roles"
- Variable name
roles - External name
roles - External namespace
urn:ietf:params:scim:schemas:core:2.0:User - Click Save
- Type

-
Edit the Mappings of your Hashboard User profile and:
-
Click "Okta User to Hashboard" at the top

-
At the bottom, you will see an empty mapping to
roles. In this field, add:Arrays.toCsvString(user.hbRoles).
-
Type in your test user's name in the Preview box. You should see their Hashboard roles outputted as a comma-separated list.

-
Click Save.
-
-
Back in the Hashboard portal, set your Directory Provider Value to
roles, and click "Save custom attributes"
